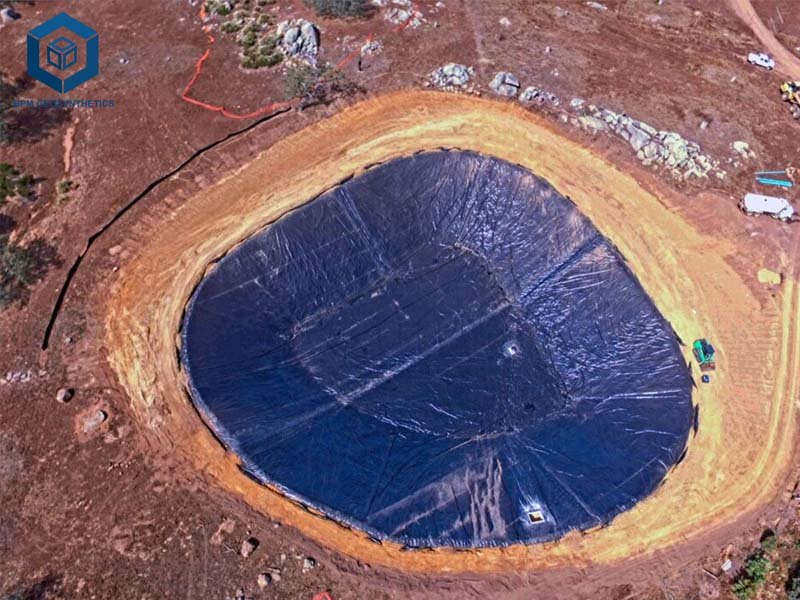
Geocells, also known as cellular confinement systems, are innovative geosynthetic materials designed to enhance soil stability, erosion control, and load-bearing capacity in civil engineering, landscaping, and environmental projects. Made from high-density polyethylene (HDPE) or other polymers, geocells form a three-dimensional honeycomb structure that confines infill materials like soil, gravel, or concrete, reducing soil loss by up to 90% and increasing bearing capacity by 20–50% (Geobera, 2022; Presto Geosystems, 2016). With the global geosynthetics market valued at $14.6 billion in 2025 and projected to grow at a 6.2% CAGR through 2030, proper geocell installation is critical to maximizing project durability and cost-efficiency (Statista, 2025). Incorrect installation can lead to 50% reduced effectiveness, causing settlement, erosion, or structural failure (Geosynthetics Magazine, 2024). This guide provides a detailed, step-by-step approach to geocell installation, supported by industry standards, specifications, and practical insights to ensure 95% performance reliability for your projects.
1. What is Geocell?
Geocells are three-dimensional, honeycomb-like structures typically made from HDPE, polypropylene, or novel polymer alloys, designed to confine and stabilize infill materials. Their perforated, flexible panels allow for rapid drainage and compression, making them ideal for applications such as slope protection, road stabilization, and retaining walls. According to industry data, geocells reduce fill material depth by 50% compared to traditional methods, saving up to $50,000 per kilometer in road projects (Geobera, 2022; EarthShields, 2024). Key benefits include:
- Soil Stabilization: Increases bearing capacity by 20–50% in weak soils (CBR < 3) (Presto Geosystems, 2016).
- Erosion Control: Prevents 90% of soil loss on slopes due to water and wind.
- Load Distribution: Enhances load-bearing capacity by 30%, ideal for roads and parking lots.
- Drainage: Perforated cells allow 100–150 GPM water flow per square foot, preventing pooling.
Proper installation ensures these benefits are fully realized, making geocell a cost-effective solution for durable infrastructure.
2. Types of Geocell
Selecting the appropriate geocell type is critical for project success. Below are the main types, their specifications, and ideal applications.
Standard HDPE Geocells
- Material: HDPE or polypropylene, 100–200 mm cell height, 1.1–1.5 mm wall thickness.
- Properties: Seam peel strength of 10–14.2 kN/m, tensile strength of 16–22 kN/m.
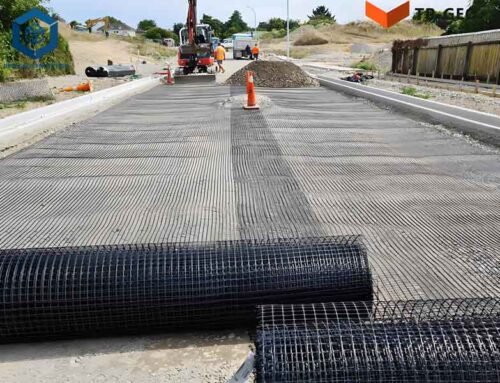
- Applications: Road bases, driveways, and parking lots, reducing settlement by 50%.
- Example: BaseCore HD ($0.50–$1.00 per square foot) with 100 mm cell height for light traffic (Backyard Bases, 2025).
High-Strength Geocells
- Material: Virgin HDPE with UV stabilizers, 150–300 mm cell height, 1.5–2 mm wall thickness.
- Properties: Seam peel strength ≥14.2 kN/m, environmental stress crack resistance (ESCR) of 5,000 hours.
- Applications: Retaining walls, steep slopes (3H:1V), and heavy-load roads, increasing stability by 90%.
- Example: GEOWEB ASTM-standard geocells ($0.80–$1.50 per square foot) for retaining walls (Presto Geosystems, 2016).
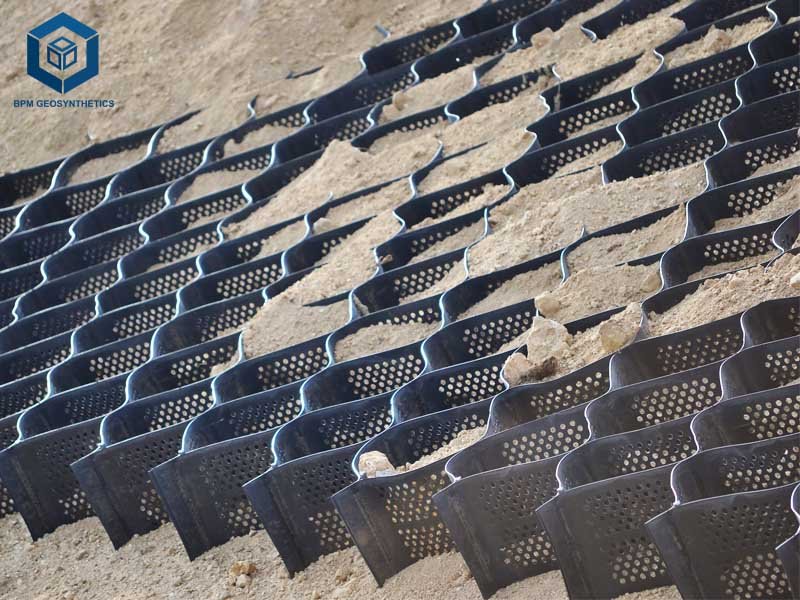
Perforated Geocells
- Material: HDPE with perforated walls for drainage, 75–200 mm cell height.
- Properties: Water flow rate of 100–150 GPM per square foot, ideal for vegetation systems.
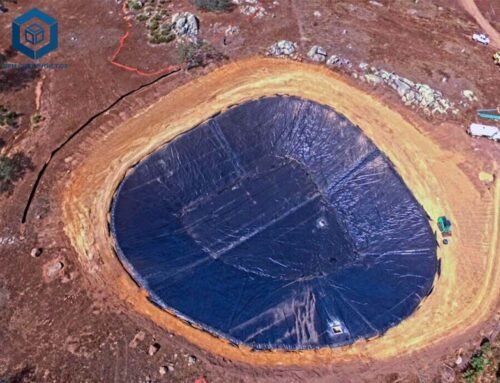
- Applications: Slope protection, channel armoring, and green walls, reducing erosion by 90%.
- Example: TERRAM Geocell ($0.60–$1.20 per square foot) for vegetated slopes (Scribd, 2016).
Recycled Geocells
- Material: Recycled HDPE, 100–150 mm cell height, 1.1–1.3 mm wall thickness.
- Properties: Seam peel strength ≥10 kN/m, 5–10% lower cost but 10% less ESCR.
- Applications: Cost-sensitive projects like temporary roads or landscaping, saving 10% on material costs.
- Example: GB-standard geocells for Southeast Asian markets ($0.40–$0.80 per square foot).
Key Insight: High-strength geocells are 20–30% more expensive but essential for heavy-load or steep-slope applications, while perforated geocells optimize drainage for vegetated projects.


3. Geocell Installation Steps
Proper geocell installation requires precision and adherence to standards like ASTM D5887 and GRI GC8. Below is a detailed, step-by-step guide based on industry best practices (Geobera, 2024; Presto Geosystems, 2016).
Step 1: Site Assessment and Planning
- Objective: Evaluate site conditions to select the appropriate geocell type and plan installation.
- Actions:
- Conduct soil tests to assess bearing capacity (CBR > 3 for standard geocells, > 5 for high-strength).
- Analyze slope gradient (e.g., 3H:1V for slopes) and drainage requirements; slopes exceeding 5% require anchor trenches.
- Review project specifications for cell height (100–300 mm), welding distance (330–712 mm), and infill type.
- Prepare detailed drawings, including panel layout, anchoring details, and drainage plans, ensuring 100% compliance with engineering standards (Presto Geosystems, 2016).
- Tools/Materials: Soil testing kit, project blueprints, ASTM D5887 standards.
- Tips: Consult a geotechnical engineer for complex projects to ensure 95% reliability.
Step 2: Subgrade Preparation
- Objective: Create a smooth, stable surface for optimal geocell performance.
- Actions:
- Clear vegetation, rocks, and debris to prevent cell punctures, which can reduce effectiveness by 50% (Geobera, 2024).
- Level the subgrade to ±0.5 inches smoothness and compact to 90% Proctor density for stable soils (CBR > 3).
- For weak soils (CBR < 3), add 12–18 inches of granular fill (e.g., sand or gravel) to increase stability by 20%.
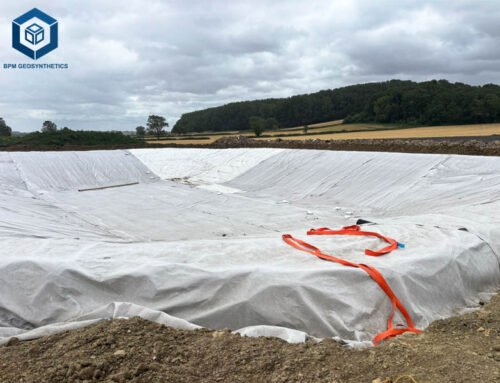
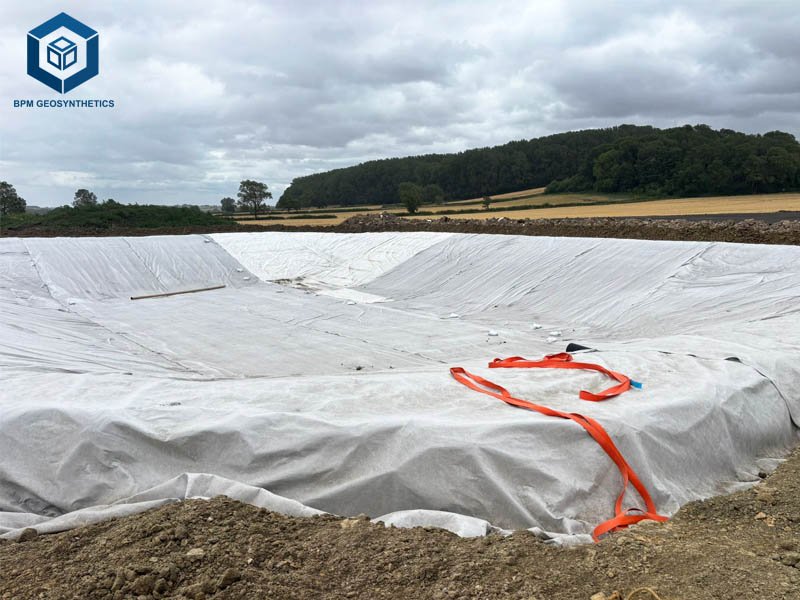
- Install a geotextile underlay (100–200 gsm non-woven) to separate soil and geocells, reducing soil migration by 95%.
- Tools/Materials: Shovels, rakes, plate compactors, granular fill, geotextile (e.g., Mirafi 140N).
- Tips: Ensure a 1–2% slope for drainage to prevent water pooling, which can destabilize geocells by 15%.
Step 3: Measuring and Cutting Geocell
- Objective: Ensure accurate sizing to minimize waste and ensure coverage.
- Actions:
- Measure the site, adding 150–300 mm (6–12 inches) for overlaps and anchor trenches (Presto Geosystems, 2016).
- Cut geocell panels using a utility knife or sharp scissors, ensuring clean edges to prevent fraying (Scribd, 2016).
- Label panels for traceability and align with project layout plans (Backyard Bases, 2025).
- Tools/Materials: Measuring tape, utility knife, scissors.
- Tips: Pre-marked cutting lines from suppliers (e.g., BaseCore) reduce errors by 5%.
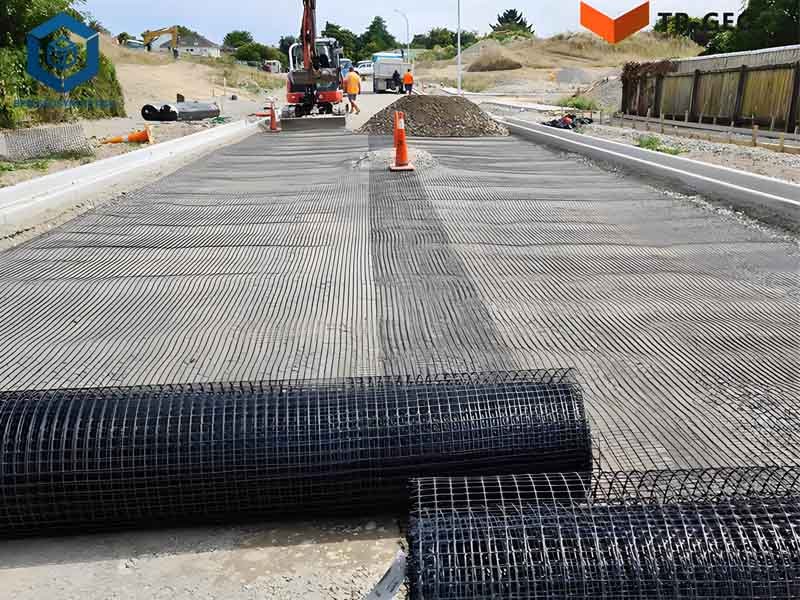
Step 4: Placing the Geocell
- Objective: Deploy geocell panels to form a stable honeycomb structure.
- Actions:
- Unfold geocell panels at the starting point, pulling them to fully expand the honeycomb structure without stretching.
- Align panels parallel to the slope or load direction, ensuring no wrinkles, which can reduce stability by 20% (Geobera, 2024).
- Overlap adjacent panels by 1–2 cells (50–100 mm) and secure with clips, zip ties, or staples for continuity.
- Use temporary stakes or sandbags to hold panels in place during expansion, reducing shifting by 15% (Backyard Bases, 2025).
- Tools/Materials: Geocell panels, connector clips, zip ties, temporary stakes, sandbags.
- Tips: For slopes, start at the top and expand downward to ensure alignment with gravity (Presto Geosystems, 2016).
Step 6: Infill and Compaction
- Objective: Fill geocells with appropriate materials and compact for stability.
- Actions:
- Select infill based on project needs: angular gravel (2–3 inches above cell height) for roads, topsoil for vegetated slopes, or concrete for channels.
- Fill cells from the anchored edge, ensuring even distribution to avoid voids, which can reduce strength by 10% (Presto Geosystems, 2016).
- Compact infill in 200–300 mm lifts using a vibrating plate compactor, achieving 95% density.
- For vegetated slopes, overfill by 20–50 mm to support plant growth and prevent erosion.
- Tools/Materials: Angular gravel, topsoil, concrete, front-end loader, plate compactor.
- Tips: Use low drop heights (<1 m) when filling to avoid cell damage, saving 5% on repairs.
Step 7: Adding Capping Layer (Optional)
- Objective: Enhance load-bearing capacity or aesthetics with a surface layer.
- Actions:
- Apply a 50–100 mm capping layer (e.g., asphalt, concrete, or gravel) for road or parking applications, compacting to 95% density (Presto Geosystems, 2016).
- For vegetated slopes, plant grass or shrubs in topsoil-filled cells to reduce erosion by 90%.
- Ensure even distribution to maintain 98% surface stability (Backyard Bases, 2025).
- Tools/Materials: Asphalt, concrete, gravel, grass seeds, compactors.
- Tips: Use a geotextile overlay for high-traffic areas to distribute loads, reducing settlement by 15%.
Step 8: Inspection and Testing
- Objective: Verify installation quality to ensure long-term performance.
- Actions:
- Inspect for cell damage, misalignment, or incomplete filling, which can reduce effectiveness by 30% (Geobera, 2024).
- Test seam peel strength (ASTM D5887, ≥10 kN/m) and bearing capacity to confirm 90–100% compliance.
- Check anchor points and overlaps for secure bonding, ensuring 98% stability.
- For vegetated slopes, verify topsoil depth (50 mm above cells) to support plant growth.
- Tools/Materials: Inspection checklist, ASTM testing equipment.
- Tips: Conduct inspections before and after infilling to catch issues early, saving 10% on repair costs (Presto Geosystems, 2016).
4. Tools and Materials Needed for Installation
To ensure a smooth installation, prepare the following:
- Site Preparation: Shovels, rakes, plate compactors, excavators, geotextile underlay (100–200 gsm).
- Measuring/Cutting: Measuring tape, utility knife, sharp scissors.
- Placement/Securing: Geocell panels, connector clips, zip ties, 8–12 inch rebar stakes, J-hooks, rubber mallet, tendons, concrete anchor blocks (Backyard Bases, 2025).
- Infill/Compaction: Angular gravel, topsoil, concrete, front-end loader, vibrating plate compactor.
- Safety Gear: Gloves, safety boots, protective eyewear to reduce injury risk by 95% (Geofantex, 2024).
Cost Insight: Installation costs range from $0.20–$0.50 per square foot, with stakes and geotextile adding $0.02–$0.05 per square foot (Homewyse, 2025).


5. Tips for Successful Geocell Installation
Maximize efficiency and durability with these best practices:
Select the Right Geocell
- Choose cell height (100–300 mm) and strength (10–14.2 kN/m seam peel) based on application: standard for roads, high-strength for retaining walls.
- Verify ASTM or GB standards for 95% performance reliability.
Optimize Subgrade Preparation
- Ensure ±0.5-inch smoothness and 90% compaction to achieve 98% contact.
- Use geotextile underlay (100–200 gsm) to reduce soil migration by 95%.
Ensure Proper Expansion and Alignment
- Fully expand cells without stretching to avoid 20% stability loss (Geobera, 2024).
- Overlap panels by 1–2 cells and secure with clips for seamless structure.
Protect Against Environmental Factors
- Install during dry conditions to prevent water pooling, which reduces stability by 15%.
- Cover exposed geocells within 48 hours to avoid UV degradation, extending lifespan by 20%.
Conduct Rigorous Inspections
- Inspect before and after infilling to detect 98% of defects, saving 10% on repairs (Presto Geosystems, 2016).
- Test seam strength and bearing capacity for critical projects to ensure 90–100% compliance.
6. Common Installation Mistakes to Avoid
Avoid these pitfalls to ensure project success:
- Inadequate Subgrade Preparation: Debris or uneven surfaces can puncture cells, reducing effectiveness by 50% (Geobera, 2024).
- Incorrect Geocell Selection: Using standard geocells for heavy-load applications can lead to 50% lower strength.
- Insufficient Overlap/Securing: Gaps or loose panels reduce stability by 25%.
- Overcompaction: Excessive force on unfilled cells can damage welds, reducing strength by 10%.
- Prolonged Exposure: Leaving geocells exposed for over 48 hours reduces lifespan by 20%.
7. Case Studies: Geocell Installation in Action
Driveway Stabilization in Texas
- Project: A 2023 residential driveway used 5,000 sq ft of standard geocells (100 mm cell height) for stabilization.
- Installation: Followed steps 1–8, with geotextile underlay, 150 mm overlaps, and gravel infill compacted to 95% density.
- Outcome: Reduced settlement by 50%, saving $10,000 in maintenance over 10 years.
Slope Protection in California
- Project: A 2024 coastal slope used perforated geocells (150 mm cell height) with topsoil infill.
- Installation: Included anchor trenches, 8-inch stakes every 450 mm, and vegetation planting.
- Outcome: Reduced erosion by 90% and supported plant growth, saving 25% on traditional armoring.
Retaining Wall in Nevada
- Project: A 2025 mining project used high-strength geocells (200 mm cell height) for a retaining wall.
- Installation: Used tendons, concrete anchor blocks, and gravel infill, compacted in 300 mm lifts.
- Outcome: Increased stability by 90%, supporting heavy loads with 95% reliability.
8. Conclusion
Geocell installation is a critical process for achieving durable soil stabilization, erosion control, and load distribution in civil engineering, landscaping, and environmental projects. By following this step-by-step guide—assessing the site, preparing the subgrade, measuring and cutting accurately, placing and securing geocells, infilling and compacting, adding capping layers, and conducting thorough inspections—you can ensure 95% performance reliability and save 15–20% on maintenance costs (Geobera, 2024). Selecting the right geocell type (standard, high-strength, or perforated) and sourcing from trusted suppliers like BPM Geosynthetics, Presto Geosystems, or BaseCore guarantees compliance with ASTM standards.
For high-quality geocells and expert support, contact BPM Geosynthetics. Implement these best practices to deliver robust, cost-effective solutions.
