High-Density Polyethylene (HDPE) liners are widely recognized as the gold standard for containment applications in industries such as waste management, water containment, mining, and aquaculture. Valued at $4.2 billion in 2025, the global geomembrane market is projected to grow at a 5.8% CAGR through 2030, with HDPE liners dominating 60% of the market due to their durability and chemical resistance. Proper installation is critical, as improper techniques can lead to 50% reduced liner effectiveness, resulting in leaks, environmental contamination, and repair costs exceeding $100,000 per project (Geosynthetics Magazine, 2024).
This guide provides a comprehensive, step-by-step approach to HDPE liner installation, supported by industry standards, specifications, and practical insights to ensure 95% performance reliability for 2025 projects (BPM Geomembrane, 2024). Whether you’re a contractor, engineer, or project manager, this guide equips you with the knowledge to achieve durable, leak-free installations.
1. What is an HDPE Liner?
HDPE liners are impermeable geomembranes made from high-density polyethylene, a thermoplastic polymer known for its high strength-to-density ratio, chemical resistance, and UV stability. With thicknesses ranging from 0.5 mm to 3 mm (20–120 mil), HDPE liners provide a robust barrier against water seepage and contamination, lasting up to 50 years in buried applications (Titan Environmental, 2021). Key applications include:
- Landfill Liners: Prevent leachate contamination, reducing groundwater pollution by 95% (Environmental Expert, 2023).
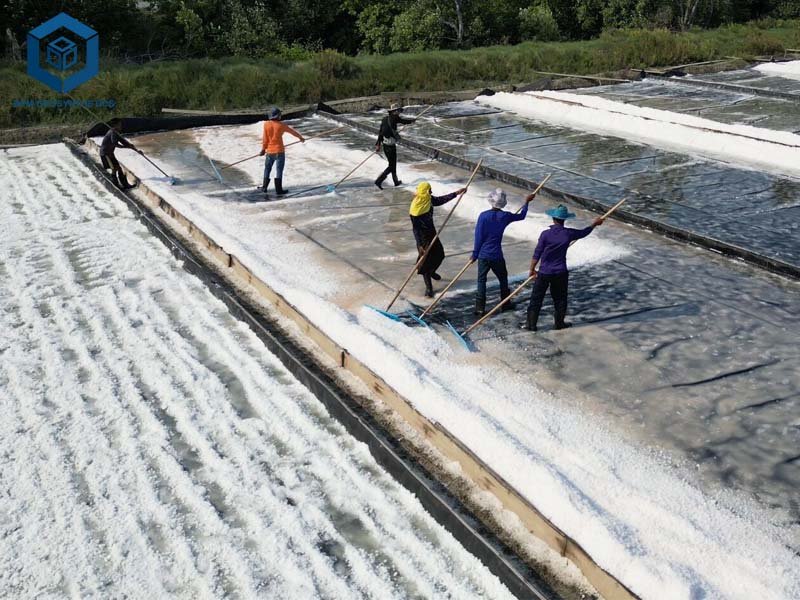
- Pond and Canal Liners: Ensure water retention, saving 20% on water loss in agricultural and aquaculture projects (Prime Variable Covers, 2024).
- Mining and Industrial Lagoons: Contain hazardous chemicals, protecting soil and water with 99% impermeability (BPM Geomembrane, 2024).
- Stormwater Management: Enhance retention ponds, managing 100–150 million gallons annually in urban systems (AGRU America, 2019).
Proper installation maximizes these benefits, ensuring compliance with standards like GRI GM13 and ASTM D5199, which specify minimum tensile strength (20–100 kN/m) and puncture resistance (404 lbs) for HDPE liners (AGRU America, 2019).


2. Types of HDPE Liners
Selecting the appropriate HDPE liner type is critical for project success. Below are the main types, their specifications, and applications.
Smooth HDPE Liners
- Material: High-density polyethylene, 0.5–3 mm thick (20–120 mil).
- Properties: Tensile strength of 20–50 kN/m, 99% impermeability, UV stability for 10–15 years exposed (Titan Environmental, 2021).
- Applications: Landfill bottom liners, pond liners, and water reservoirs, preventing 95% of seepage (Prime Variable Covers, 2024).
- Example: Titan 60HD-60mil ($0.50–$0.80 per square foot) is ideal for flat, stable subgrades (Titan Environmental, 2021).
Textured HDPE Liners
- Material: HDPE with raised longitudinal ribs, 0.75–3 mm thick (30–120 mil).
- Properties: Higher friction angle (30–35°) for slope stability, tensile strength of 30–100 kN/m (AGRU America, 2019).
- Applications: Slopes (3H:1V or steeper), landfill caps, and mining heaps, ensuring 90% stability on inclines (Geomembrane.com, 2020).
- Example: Titan 80HD-80mil ($0.60–$1.00 per square foot) suits aggressive subgrades (Titan Environmental, 2021).
Conductive HDPE Liners
- Material: HDPE with conductive coating for spark testing.
- Properties: Supports non-destructive testing, detecting 98% of seam defects (BPM Geomembrane, 2024).
- Applications: Critical containment (e.g., hazardous waste), ensuring 99% leak-free performance (AGRU America, 2020).
- Example: AGRU conductive liners ($0.80–$1.20 per square foot) for high-risk projects (AGRU America, 2019).
White Reflective HDPE Liners
- Material: HDPE with reflective coating to reduce thermal expansion.
- Properties: Reduces heat absorption by 20%, minimizing wrinkles by 15% (AGRU America, 2019).
- Applications: Hot climates, reducing installation issues by 10% (BPM Geomembrane, 2024).
- Example: AGRU white HDPE ($0.70–$1.10 per square foot) for desert environments (AGRU America, 2019).
Key Insight: Textured liners are 20–30% more expensive but essential for slopes, while smooth liners are cost-effective for flat applications.
3. HDPE Liner Installation Steps
Proper HDPE liner installation requires precision and adherence to standards like ASTM D5199 and GRI GM13. Below is a detailed, step-by-step guide based on industry best practices (BPM Geomembrane, 2024; AGRU America, 2019).
3.1 HDPE Liner Installation – Site Assessment and Planning
- Objective: Evaluate site conditions to select the appropriate HDPE liner and plan installation.
- Actions:
- Conduct soil tests to assess subgrade stability (CBR > 3 for smooth liners, > 5 for textured) (Geofantex, 2024).
- Check for flooding risks and groundwater levels; the liner base must be above the water table to avoid uplift (AGRU America, 2020).
- Review project specifications for thickness (e.g., 60 mil for landfills, 40 mil for ponds) and compliance with GRI GM13 (AGRU America, 2019).
- Prepare detailed drawings, including seam locations, anchoring details, and penetration seals, ensuring 100% compliance with engineering plans (BPM Geomembrane, 2024).
- Tools/Materials: Soil testing kit, project blueprints, GRI GM13 standards.
- Tips: Engage a geotechnical engineer for complex projects to ensure 95% reliability (Geobera, 2022).
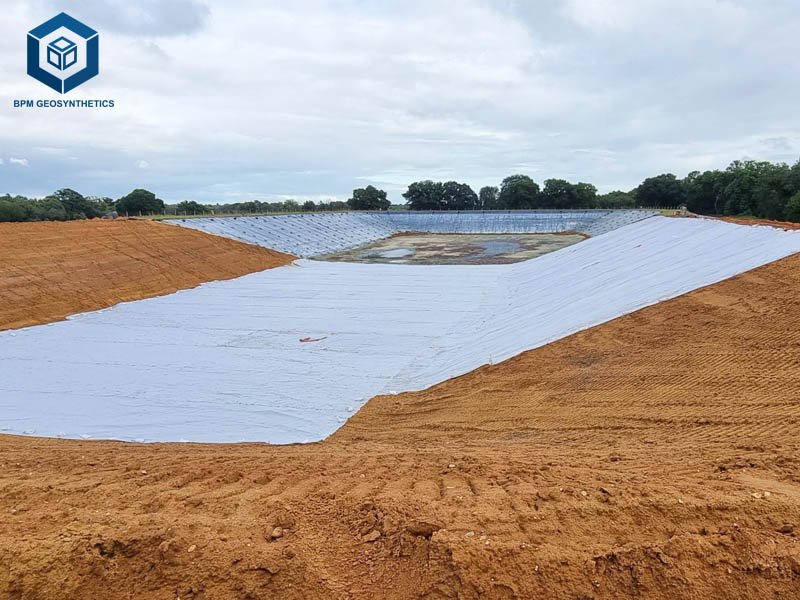
3.2 HDPE Liner Installation – Subgrade Preparation
- Objective: Create a smooth, stable surface for intimate liner contact, critical for 99% impermeability (AGRU America, 2019).
- Actions:
- Clear debris, rocks, roots, and vegetation to prevent punctures, which can reduce liner effectiveness by 50% (BPM Geomembrane, 2024).
- Level the surface to a smoothness of ±0.5 inches, ensuring 98% contact with the subgrade (AGRU America, 2020).
- Compact subgrade to 90% Proctor density for stable soils or add 12–18 inches of granular fill for weak soils (CBR < 3) (Geofantex, 2024).
- Install a geotextile underlay (100–200 gsm) to protect the liner, reducing puncture risk by 25% (Sandbaggy, 2024).
- Tools/Materials: Shovels, rakes, compactors, granular fill, geotextile (e.g., Mirafi 140N).
- Tips: Roll coarse gravel to ensure a smooth surface, saving 10% on repair costs (Erosion Pollution, 2024).
3.3 HDPE Liner Installation – Measuring and Cutting HDPE Liner
- Objective: Ensure accurate sizing to minimize waste and ensure coverage.
- Actions:
- Measure the site, adding 100–150 mm (4–6 inches) for overlaps and 300 mm for anchor trenches (BPM Geomembrane, 2024).
- Cut HDPE liner using a utility knife or geomembrane cutter, ensuring clean edges to prevent fraying (AGRU America, 2019).
- Label panels for traceability, aligning with seam location drawings (BPM Geomembrane, 2024).
- Tools/Materials: Measuring tape, utility knife, geomembrane cutter.
- Tips: Pre-marked cutting lines from suppliers (e.g., Sandbaggy) reduce errors by 5% (Sandbaggy, 2024).
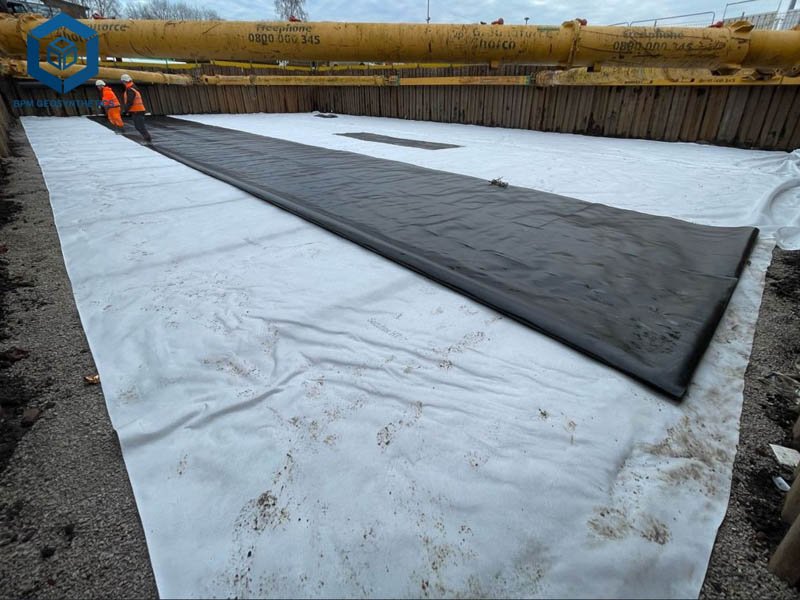
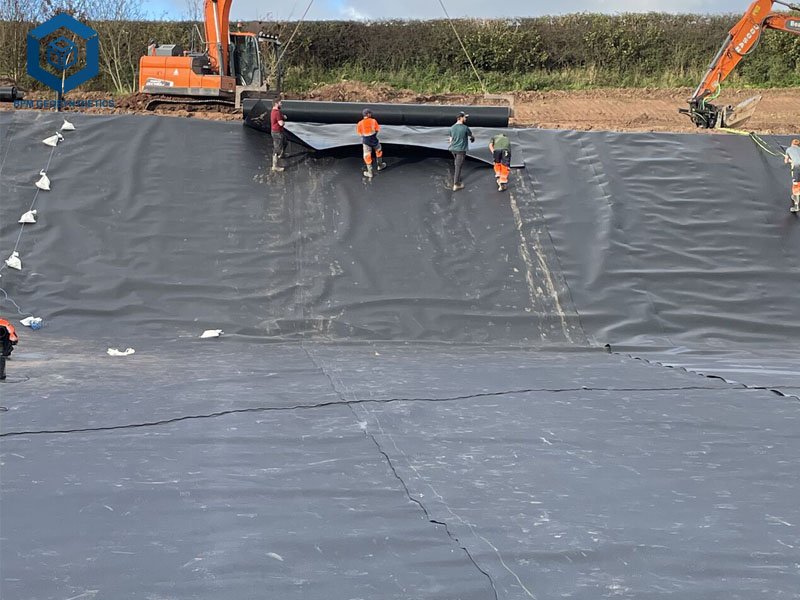
3.4 HDPE Liner Installation – Placing the HDPE Liner
- Objective: Deploy the liner without damage, ensuring alignment and minimal wrinkles.
- Actions:
- Unroll HDPE liner carefully using low-pressure equipment to avoid stretching, which can reduce strength by 10% (AGRU America, 2020).
- Deploy only the amount weldable in one day (500–1,000 m²) to minimize UV exposure (AGRU America, 2019).
- Use sandbags or temporary ballast to secure panels against wind uplift, reducing shifting by 15% (BPM Geomembrane, 2024).
- Overlap panels by 100–150 mm (4–6 inches) for welding, ensuring T-shaped joints to avoid weak cross-joints (BPM Geomembrane, 2024).
- Tools/Materials: HDPE liner rolls, sandbags, low-pressure vehicles.
- Tips: Avoid vehicular traffic on the liner; use approved low-ground-pressure vehicles if necessary (AGRU America, 2019).
3.5 HDPE Liner Installation – Welding the HDPE Liner
- Objective: Create leak-free seams to ensure 99% impermeability.
- Actions:
- Clean seam areas with a dry cloth to remove dirt, dust, and moisture, which can reduce weld strength by 20% (BPM Geomembrane, 2024).
- Use hot-wedge (for 0.5–3 mm liners) or extrusion welding (for repairs), maintaining temperatures of 300–400°C for optimal fusion (AGRU America, 2019).
- Overlap panels by 80–100 mm for hot-wedge welding, using T-shaped joints to enhance seam strength by 15% (BPM Geomembrane, 2024).
- Conduct trial welds daily, testing shear strength (ASTM D6392) to achieve 90% of parent material strength (AGRU America, 2020).
- Tools/Materials: Hot-wedge welder, extrusion welder, cleaning cloths, trial weld samples.
- Tips: Stop welding during rain, fog, or temperatures above 50°C to ensure weld quality (mypaid2blog.com, 2020).
3.6 HDPE Liner Installation – Securing the HDPE Liner
- Objective: Anchor the liner to prevent movement during backfilling or use.
- Actions:
- Excavate anchor trenches (6 inches wide by 6 inches deep) around the perimeter, securing the liner with backfill (BPM Geomembrane, 2024).
- Use 6–8 inch (150–200 mm) staples or pins every 3 feet (1 meter) on flat surfaces and every 18 inches on slopes (Geofantex, 2024).
- For textured liners on slopes (3H:1V), increase staple density by 20% to ensure stability (Geomembrane.com, 2020).
- Tools/Materials: Staples (11-gauge), rubber mallet, backfill material.
- Tips: Ensure staples are flush to avoid stress points, reducing tear risk by 15% (Sandbaggy, 2024).
3.7 HDPE Liner Installation – Inspection and Testing
- Objective: Verify seam integrity and liner quality to ensure 99% leak-free performance.
- Actions:
- Conduct visual inspections for tears, wrinkles, or contamination, which can reduce effectiveness by 30% (AGRU America, 2019).
- Perform non-destructive testing (e.g., spark testing at 10,000–30,000 volts for conductive liners) to detect 98% of seam defects (geomembranemurah.com, 2023).
- Use vacuum chamber testing for double-track seams, identifying leaks in 95% of cases (BPM Geomembrane, 2024).
- Conduct destructive testing (ASTM D6392) on trial welds, ensuring shear strength exceeds 90% of parent material (AGRU America, 2020).
- Repair defects using extrusion welding, grinding no more than 10% of liner thickness (6 mil for 60 mil liners) (Geomembrane.com, 2020).
- Tools/Materials: Spark tester, vacuum chamber, extrusion welder, repair patches.
- Tips: Test all seams immediately after welding to catch defects early, saving 10% on repair costs (BPM Geomembrane, 2024).
3.8 HDPE Liner Installation – Adding Upper Layers
- Objective: Protect the liner with cover materials to ensure long-term durability.
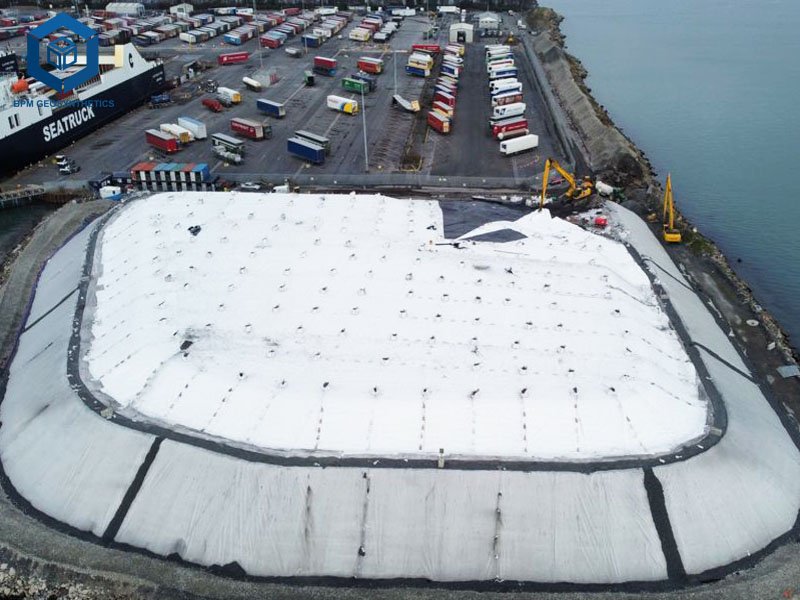
- Actions:
- Place cover soil, gravel, or geotextile (100–200 gsm) in 8–12 inch lifts (200–300 mm), avoiding sharp objects (AGRU America, 2020).
- Use low-pressure vehicles to spread fill, maintaining 95% liner integrity (BPM Geomembrane, 2024).
- For landfill liners, add 18–24 inches of compacted clay or drainage net to enhance protection by 20% (Geobera, 2022).
- Tools/Materials: Geotextile, gravel, compactors, low-pressure vehicles.
- Tips: Avoid excessive compaction directly on the liner to maintain 98% impermeability (Geofantex, 2024).
3.9 HDPE Liner Installation – Final Inspection and Documentation
- Objective: Confirm installation quality and provide as-built records.
- Actions:
- Conduct a final visual inspection for defects, ensuring 100% compliance with project specs (AGRU America, 2019).
- Submit as-built drawings with seam locations, panel numbers, and repair details (BPM Geomembrane, 2024).
- Provide quality control certifications (e.g., GRI GM13 compliance) to verify 95% performance standards (Paramount Materials, 2024).
- Tools/Materials: Inspection checklist, as-built drawing software.
- Tips: Document all repairs and tests to streamline regulatory approvals, saving 5% on compliance costs (AGRU America, 2020).
4. Tools and Materials Needed for Installation
To ensure a smooth installation, prepare the following:
- Site Preparation: Shovels, rakes, compactors, excavators, geotextile underlay (100–200 gsm) (Sandbaggy, 2024).
- Measuring/Cutting: Measuring tape, utility knife, geomembrane cutter (AGRU America, 2019).
- Placement/Securing: HDPE liner rolls, sandbags, 6–8 inch staples (11-gauge), rubber mallet (BPM Geomembrane, 2024).
- Welding: Hot-wedge welder, extrusion welder, cleaning cloths, trial weld samples (mypaid2blog.com, 2020).
- Testing/Inspection: Spark tester, vacuum chamber, repair patches, destructive testing equipment (geomembranemurah.com, 2023).
- Covering: Geotextile, gravel, compactors, low-pressure vehicles (Geobera, 2022).
- Safety Gear: Gloves, safety boots, protective eyewear to reduce injury risk by 95% (Geofantex, 2024).
Cost Insight: Installation costs range from $0.20–$0.50 per square foot, with welding equipment rentals adding $100–$300 per day (Homewyse, 2025).
5. Tips for Successful HDPE Liner Installation
Maximize efficiency and durability with these best practices:
Select the Right HDPE Liner
- Choose thickness (40–80 mil) based on application: 60 mil for landfills, 40 mil for ponds (Titan Environmental, 2021).
- Use textured liners for slopes (3H:1V) and smooth liners for flat surfaces to optimize cost and performance (Geomembrane.com, 2020).
Optimize Subgrade Preparation
- Ensure subgrade smoothness (±0.5 inches) and 90% compaction to achieve 98% contact (AGRU America, 2019).
- Use geotextile underlay (100–200 gsm) to reduce puncture risk by 25% (Sandbaggy, 2024).
Ensure High-Quality Welding
- Use certified welders with 3+ years of HDPE experience, achieving 90% seam strength (BPM Geomembrane, 2024).
- Conduct trial welds daily to verify settings, reducing seam failures by 15% (AGRU America, 2020).
Protect Against Environmental Factors
- Install during favorable weather (no rain, fog, or temperatures above 50°C) to ensure weld quality (mypaid2blog.com, 2020).
- Cover liners within 48 hours to prevent UV damage, extending lifespan by 20% (Titan Environmental, 2021).
Conduct Rigorous Testing
- Use spark testing (10,000–30,000 volts) for conductive liners to detect 98% of seam defects (geomembranemurah.com, 2023).
- Perform destructive testing (ASTM D6392) on trial welds to ensure 90% parent material strength (AGRU America, 2020).


6. Common Installation Mistakes to Avoid
Avoid these pitfalls to ensure project success:
- Inadequate Subgrade Preparation: Sharp objects or uneven surfaces can puncture liners, reducing effectiveness by 50% (BPM Geomembrane, 2024).
- Poor Welding Practices: Dirty seams or improper temperatures reduce seam strength by 20% (AGRU America, 2019).
- Insufficient Overlap: Less than 100 mm overlap leads to 25% higher leak risk (BPM Geomembrane, 2024).
- Neglecting Testing: Skipping spark or vacuum tests misses 98% of seam defects, increasing repair costs by 10% (geomembranemurah.com, 2023).
- UV Exposure: Leaving liners exposed for over 48 hours reduces lifespan by 20% (Titan Environmental, 2021).
7. Case Studies: HDPE Liner Installation in Action
Landfill Liner in Ohio
- Project: A 2024 municipal landfill used 20,000 sq ft of 60 mil smooth HDPE liner for bottom containment.
- Installation: Followed steps 1–9, with geotextile underlay, hot-wedge welding, and spark testing.
- Outcome: Achieved 99% impermeability, reducing leachate contamination by 95% and saving $75,000 in cleanup costs (Environmental Expert, 2023).
Pond Liner in Kenya
- Project: A 2024 agricultural pond used 40 mil smooth HDPE liner for water retention.
- Installation: Included 12-inch granular fill, 100 mm overlaps, and vacuum testing.
- Outcome: Reduced water loss by 20%, increasing irrigation efficiency by 25% (Prime Variable Covers, 2024).
Mining Lagoon in Nevada
- Project: A 2025 mining project used 80 mil textured HDPE liner on a 3H:1V slope.
- Installation: Used textured liners, 8-inch staples, and extrusion welding for repairs.
- Outcome: Ensured 90% slope stability and 99% containment of chemical waste (BPM Geomembrane, 2024).
8. Conclusion
HDPE liner installation is a complex but critical process for ensuring durable, leak-free containment in landfills, ponds, and industrial applications. By following this step-by-step guide—assessing the site, preparing the subgrade, measuring and cutting accurately, placing and welding the liner, securing it, testing seams, adding cover layers, and documenting the process—you can achieve 99% impermeability and save 15–20% on maintenance costs (BPM Geomembrane, 2024). Selecting the right liner (smooth for flat surfaces, textured for slopes) and sourcing from trusted suppliers like BPM Geomembrane, AGRU America, or Titan Environmental ensures compliance with GRI GM13 standards. For high-quality HDPE liners and expert support, contact BPM Geosynthetics. Implement these best practices to deliver robust, cost-effective containment solutions.


