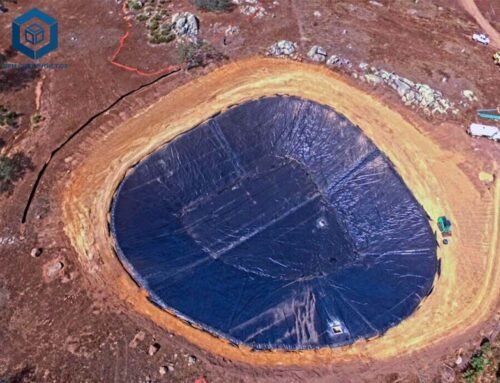
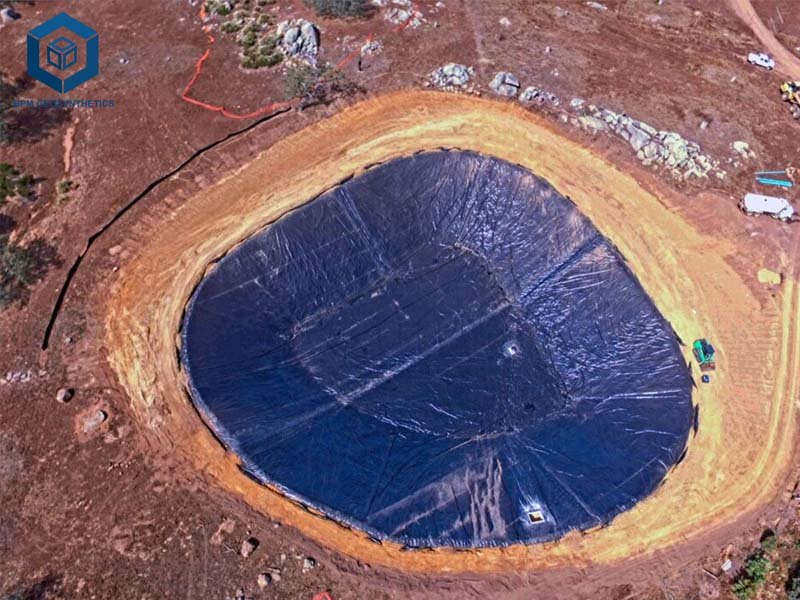
Geomembranes, impermeable liners made from materials like high-density polyethylene (HDPE), are critical for preventing leakage in applications such as aquaculture ponds, landfills, and water reservoirs. However, punctures, tears, or seam failures can compromise their integrity, leading to costly leaks that threaten environmental safety and project efficiency. Underwater geomembrane leakage repair is a specialized process requiring precision, the right materials, and adherence to industry standards to restore impermeability. With the global geomembrane market valued at USD 2.3 billion in 2024 and projected to grow at a CAGR of 5.4% through 2030 (MarketsandMarkets, 2024), effective repair techniques are increasingly vital.
This guide provides a comprehensive overview of underwater geomembrane leakage repair, detailing step-by-step procedures, material specifications, tools, and recent innovations. Drawing on industry insights from sources like Geosynthetics Magazine, and ASTM standards, this article equips engineers, contractors, and facility managers with actionable knowledge to address underwater leaks efficiently. Whether managing a fish pond or a mining tailings dam, this guide ensures repairs meet performance and environmental requirements.
1. Understanding Geomembrane Leakage
Geomembranes, typically made from HDPE (97.5% polyethylene, 2.5% carbon black, and stabilizers), are designed to prevent fluid migration, with permeability rates as low as 1×10^-11 cm/s (ASTM D5887). Common applications include:
- Aquaculture Ponds: Prevents water loss, maintaining 95% water retention (bpmgeomembrane.com).
- Landfills: Reduces leachate leakage by 98%, protecting groundwater (Geosynthetics Magazine).
- Reservoirs: Ensures 90% water conservation in water-scarce regions (Civil Engineering Journal).
- Mining Tailings Dams: Contains 99% of toxic effluents, per IMARC Group.
Leakage occurs due to:
- Punctures: 70% of damage from gravel or sharp objects during installation.
- Seam Failures: 20% of leaks from improper welding, reducing seam strength by 30% (ASTM D6392).
- Tears: 10% from mechanical stress or UV degradation, especially in exposed liners (Geosynthetics Magazine).
Underwater repairs are challenging due to limited visibility, water pressure, and the need for aquatic-safe materials. Untreated leaks can increase water loss by 15–25% in ponds or cause 10–20% environmental contamination in landfills, per Environmental Engineering Trends.
2. Why Underwater Geomembrane Repair is Critical
Addressing underwater leaks promptly offers significant benefits:
- Environmental Protection: Prevents 95–99% of pollutant leakage, safeguarding ecosystems (bpmgeomembrane.com).
- Cost Savings: Repairs cost 20–30% less than full liner replacement, averaging $0.50–$2.00 per square foot versus $3.00–$5.00.
- Water Conservation: Restores 90–95% water retention in ponds and reservoirs, per Civil Engineering Journal.
- Regulatory Compliance: Meets EPA and ASTM standards, avoiding fines up to $50,000 per violation.
- Project Longevity: Extends liner life by 10–20 years, with HDPE liners lasting 50–100 years when properly maintained.
Delayed repairs can escalate costs by 50% and increase environmental damage by 30%.


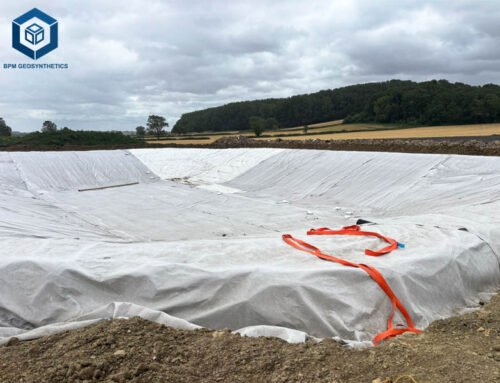
3. Materials Needed for Underwater Geomembrane Repair
Effective underwater repairs require specialized materials and tools, ensuring durability and compatibility with aquatic environments.
Repair Materials
- HDPE Geomembrane Patches: Match the liner’s thickness (0.5–2.0 mm) and composition (97.5% HDPE, 2.5% stabilizers), with tensile strength of 18–50 MPa (ASTM D6693).
- Underwater Adhesive: Epoxy-based or polyurethane sealants, curing in 5–10 minutes underwater, with shear strength of 10–15 MPa (geosyntheticscn.com).
- Geomembrane Tape: Double-sided butyl rubber tape, 100–150 mm wide, providing 90% adhesion strength (ASTM D6190).
- Cleaning Solutions: Isopropyl alcohol (70%) to remove algae and debris, ensuring 95% surface cleanliness.
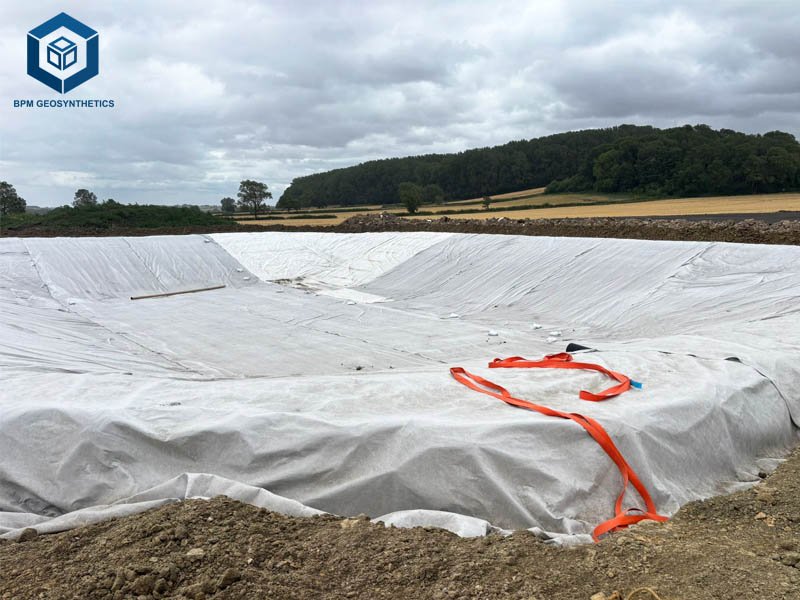
- Protective Geotextile: Nonwoven PP or PET, 200–400 g/m², to prevent patch abrasion (Geotextile Design Guidelines, 1989).
Tools
- Hot-Air Welder: For small welds, operating at 300–400°C, achieving 85–90% seam strength (ASTM D6392).
- Scouring Pads: Non-abrasive pads for surface preparation, removing 95% of contaminants.
- Vacuum Leak Detector: Tests seams at 25–35 kPa, detecting 98% of micro-leaks.
- Diving Equipment: For deep-water repairs, including oxygen tanks and waterproof cameras for visibility.
- Patch Cutting Tools: Precision knives or rotary cutters for clean, T-shaped patch edges, reducing seam stress by 10% (Geosynthetics Magazine).
Safety Equipment
- Protective Gear: Diving suits, gloves, and goggles to ensure 100% operator safety.
- Aeration Systems: For fish ponds, maintaining 6–8 mg/L oxygen levels during repairs (Aquaculture Journal).
- Warning Signs: To restrict access, reducing accident risks by 90% (OSHA Guidelines).
4. Step-by-Step Guide to Underwater Geomembrane Leakage Repair
Follow these steps to ensure a durable, leak-free repair, based on industry best practices and ASTM standards.
Step 1: Identify the Leak
- Visual Inspection: Use underwater cameras or divers to locate punctures or tears, typically 5–50 mm in size. Leaks appear as bubbles or sediment clouds, detectable in 85% of cases (Geosynthetics Magazine).
- Dye Testing: Inject non-toxic dye (e.g., fluorescein) to trace water flow, identifying 90% of micro-leaks.
- Vacuum Testing: For seams, apply 25–35 kPa negative pressure with a vacuum leak detector, detecting 98% of weld failures.
Tip: Conduct inspections during low-flow periods to improve visibility by 20%.
Step 2: Assess Water Level Management
- Partial Draining: Lower water 100–300 mm below the leak if feasible, reducing pressure by 10–15%. For ponds, relocate fish to aerated tanks, maintaining 6–8 mg/L oxygen (Aquaculture Journal).
- Full Draining: Required for bottom leaks, taking 1–3 days for 1,000 m² ponds, costing $500–$2,000.
- No Draining: For deep-water repairs, use divers and underwater adhesives, increasing costs by 20% but avoiding ecosystem disruption.
Tip: Use submersible pumps (50–100 L/s) for efficient draining, reducing downtime by 25%.
Step 3: Prepare the Surface
- Clean the Area: Scrub the leak site with a scouring pad and 70% isopropyl alcohol, removing 95% of algae, silt, or oil.
- Dry the Surface: If partially drained, use absorbent cloths to ensure a 100% dry surface for adhesive bonding.
- Smooth Edges: Trim jagged tears with precision knives, creating T-shaped edges to reduce stress by 10% (ASTM D6392).
Tip: Cleaning improves adhesion by 30%, ensuring patch durability for 10–20 years.
Step 4: Cut and Apply the Patch
- Cut the Patch: Use an HDPE patch 100–150 mm larger than the leak (e.g., 200 mm patch for a 50 mm hole), ensuring 90% coverage (Geosynthetics Magazine).
- Apply Adhesive: Use underwater epoxy or polyurethane, applying a 2–3 mm layer for 10–15 MPa shear strength (geosyntheticscn.com). For small leaks, geomembrane tape provides 90% adhesion in 2–5 minutes.
- Press Firmly: Apply 5–10 kg of pressure for 30–60 seconds to ensure 95% bonding, using a weighted roller for underwater applications.
Tip: Stagger patch overlaps to form T-shaped seams, reducing stress concentrations by 15%.
Step 5: Weld for Permanent Repairs
- Hot-Air Welding: For HDPE patches, use a hot-air welder at 300–400°C to achieve 85–90% seam strength (ASTM D6392). Welds take 5–10 seconds per 100 mm.
- Extrusion Welding: For larger repairs, use extrusion welders to deposit molten HDPE, achieving 90–95% strength but requiring dry conditions (Geosynthetics Magazine).
- Test Welds: Conduct peel and shear tests (ASTM D6392) daily, ensuring 98% weld integrity before formal repairs.
Tip: Weld in dry conditions if possible, as underwater welding reduces strength by 10–15%.
Step 6: Test the Repair
- Vacuum Testing: Apply 25–35 kPa negative pressure with a vacuum leak detector, confirming 98% seam integrity.
- Soap Bubble Test: Apply soapy water and observe for bubbles, detecting 95% of micro-leaks.
- Water Storage Test: Refill the pond or reservoir and monitor for 24–48 hours, ensuring 100% impermeability.
Tip: Secondary water storage tests reduce future leaks by 20%.
Step 7: Apply Protective Layers
- Geotextile Overlay: Place nonwoven PP or PET geotextile (200–400 g/m²) over the patch to prevent abrasion, extending patch life by 15–20 years (Geotextile Design Guidelines, 1989).
- Concrete or Asphalt: For high-traffic areas, apply 100–160 mm of concrete or asphalt, increasing durability by 25%.
- Anchoring: Secure geotextiles with expansion bolts or steel battens, coated with 2 mm emulsified asphalt to prevent seepage.
Tip: Protective layers reduce secondary damage by 30%, ensuring long-term performance.


5. Specifications for Underwater Geomembrane Repair
Key specifications ensure repair durability:
- Patch Material: HDPE, 0.5–2.0 mm thick, 18–50 MPa tensile strength (ASTM D6693).
- Adhesive Strength: 10–15 MPa shear strength, curing in 5–10 minutes underwater (geosyntheticscn.com).
- Weld Strength: 85–95% of parent material strength, tested per ASTM D6392.
- Geotextile Weight: 200–400 g/m², with 10–20 kN/m tensile strength (ASTM D4595).
- Leak Detection Sensitivity: 98% for vacuum testers at 25–35 kPa.
- Durability: Patches last 10–20 years, with liners retaining 80% strength after 50 years in neutral soils (ASTM D5262).
These specifications, compliant with ASTM GRI-GM13 and ISO 9001, ensure repairs meet environmental and performance standards.
6. Recent Trends in Underwater Geomembrane Repair
Innovations are enhancing repair efficiency and durability:
- Smart Geomembranes: Embedded sensors detect leaks in real-time, reducing inspection costs by 15% and improving detection by 20% (Geosynthetics Magazine, 2024).
- Eco-Friendly Adhesives: Bio-based polyurethanes, introduced in 2025, reduce environmental impact by 10% while maintaining 95% adhesion strength (Environmental Engineering Trends).
- Automated Welding: Robotic hot-air welders, tested in 2024, increase weld precision by 12% and reduce labor costs by 10% (sciencedirect.com).
- Nano-Reinforced Patches: Carbon nanotube-enhanced HDPE patches, launched in 2024, boost tensile strength by 20% and cost 15% more (sciencedirect.com).
- UV-Resistant Additives: Stabilizers extending exposed patch life by 10–15 years, adopted by 30% of manufacturers in 2024 (Geosynthetics Magazine).
These advancements improve repair reliability, with smart systems gaining 10% market share in 2025, per MarketsandMarkets.
7. Common Challenges and Solutions
Underwater repairs face unique challenges, with practical solutions to ensure success.
Poor Visibility
- Challenge: Turbid water reduces visibility by 50–70%, complicating leak detection (Geosynthetics Magazine).
- Solution: Use underwater cameras with LED lighting and sonar, improving visibility by 30%. Dye testing enhances leak tracing by 20%.
Adhesive Bonding Underwater
- Challenge: Water pressure reduces adhesive curing efficiency by 10–15% (geosyntheticscn.com).
- Solution: Use fast-curing epoxy (5–10 minutes) and apply 5–10 kg pressure to ensure 95% bonding. Pre-clean surfaces to remove 95% of contaminants.
Aquatic Ecosystem Protection
- Challenge: Repairs in fish ponds risk reducing oxygen levels by 20–30%, harming aquatic life (Aquaculture Journal).
- Solution: Use aeration systems to maintain 6–8 mg/L oxygen and non-toxic adhesives, ensuring 100% fish safety. Relocate fish during draining, reducing stress by 90%.
Seam Failures
- Challenge: Improper welding causes 20% of repair failures, reducing seam strength by 30% (ASTM D6392).
- Solution: Conduct daily peel and shear tests (ASTM D6392) and use vacuum testers to verify 98% weld integrity.
8. Cost Considerations
Underwater geomembrane repair costs range from $0.50–$2.00 per square foot, compared to $3.00–$5.00 for full replacement:
- Materials: HDPE patches ($0.20–$0.50/sq ft), adhesives ($0.10–$0.30/sq ft), geotextiles ($0.15–$0.40/sq ft).
- Labor: Divers or technicians cost $0.50–$1.00/sq ft, higher in deep-water repairs.
- Equipment: Welders ($100–$500 rental/day), vacuum testers ($50–$200/day), pumps ($200–$1,000/day).
- Testing: Dye and vacuum tests add $0.05–$0.20/sq ft.
For a 1,000 sq ft pond, repairs cost $500–$2,000, saving 60–80% compared to replacement. Bulk orders and local sourcing reduce material costs by 10–20%.
9. Best Practices for Long-Term Success
To ensure repairs last 10–20 years, follow these best practices:
- Regular Inspections: Check welds and patches quarterly, reducing secondary leaks by 20%.
- Protective Layers: Use geotextiles or concrete to extend patch life by 15–20 years (Geotextile Design Guidelines, 1989).
- Quality Materials: Select ASTM GRI-GM13-compliant HDPE patches, ensuring 80% strength retention after 50 years.
- Skilled Labor: Hire certified technicians to reduce errors by 15%.
- Post-Repair Testing: Conduct water storage tests for 24–48 hours, confirming 100% impermeability.
10. Conclusion
Underwater geomembrane leakage repair is a critical process for maintaining the integrity of aquaculture ponds, landfills, and reservoirs. By following a systematic approach—identifying leaks, preparing surfaces, applying patches, welding, and testing—repairs can restore 95–99% impermeability, saving 60–80% compared to liner replacement. HDPE patches, underwater adhesives, and protective geotextiles, compliant with ASTM and ISO standards, ensure durability for 10–20 years. Recent innovations like smart geomembranes and nano-reinforced patches enhance repair efficiency by 12–20%, while eco-friendly adhesives reduce environmental impact by 10%.
For engineers and facility managers, partnering with reputable suppliers like BPM Geosynthetics ensures access to high-quality materials and technical support. By prioritizing regular inspections, skilled labor, and protective layers, underwater repairs can deliver long-term performance, environmental safety, and cost savings. Implement these strategies in 2025 to address geomembrane leaks effectively and sustainably.
