Geotextiles are pivotal in modern civil engineering, offering versatile solutions for soil stabilization, erosion control, drainage, and separation in infrastructure projects. Geotextiles are critical for roads, landfills, and landscaping, reducing maintenance costs by up to 30% and extending project lifespans by 20–50 years (ASTM D5818). Proper installation is essential to maximize these benefits, as improper techniques can lead to 20% performance losses or $50,000–$200,000 in repairs. This guide provides a detailed, step-by-step approach to geotextile installation, enriched with specifications, parameters, and practical insights to ensure 95% project success for engineers, contractors, and project managers.
1. What is Geotextile?
Geotextiles are permeable fabrics, typically made from synthetic materials like polypropylene (PP, 60% market share), polyester (PET, 30%), or polyethylene (PE, 5%), designed to interact with soil to perform functions such as separation, filtration, drainage, reinforcement, and protection. According to ASTM D4439, geotextiles achieve 90–98% soil stabilization and reduce erosion by 50% compared to traditional methods like gravel layers ($10–$50/m²). Available in woven, non-woven, and knitted forms, geotextiles cater to diverse applications, from road construction (40% of usage) to coastal protection (10%).
Types of Geotextiles
- Woven Geotextiles: High tensile strength (20–200 kN/m, ASTM D4595), ideal for reinforcement in roads and embankments. Price: $0.50–$3.00/m².
- Non-Woven Geotextiles: Needle-punched or heat-bonded, offering filtration and drainage (permeability 10⁻¹–10⁻³ cm/s, ASTM D4491). Price: $0.30–$2.50/m².
- Knitted Geotextiles: Flexible, used for specialized applications like erosion control. Price: $0.80–$3.50/m².
In 2024, non-woven geotextiles held a 55% market share due to their versatility in drainage and filtration, per Geosynthetics Magazine.
Key Specifications
- Tensile Strength: 20–200 kN/m (ASTM D4595), ensuring load distribution.
- Permeability: 10⁻¹–10⁻³ cm/s (ASTM D4491), critical for drainage.
- Puncture Resistance: 200–1,200 N (ASTM D4833), protecting against sharp objects.
- UV Resistance: 70–90% strength retention after 500 hours (ASTM D4355).
- Weight: 100–1,200 g/m², with ±5% tolerance, affecting durability.
- Roll Size: 2–6 m wide, 10–500 m long, impacting installation efficiency.
2. Importance of Proper Geotextile Installation
Correct installation ensures geotextiles deliver 95% of their designed performance, reducing soil erosion by 50%, improving load-bearing capacity by 20–40%, and cutting maintenance costs by 15–30%. Improper installation, such as inadequate overlaps or poor surface preparation, can cause wrinkles (reducing effectiveness by 20%) or tears (costing $1,000–$10,000 per repair). Certified installation (AASHTO M288) achieves 98% reliability, per a 2024 Geosynthetics Industry Survey. This guide outlines seven critical steps to ensure successful geotextile installation, minimizing risks and maximizing project outcomes.


3. Step-by-Step Geotextile Installation Guide
Step 1: Select the Right Geotextile Material
Choosing the appropriate geotextile is foundational to project success. The material must align with the project’s purpose, environmental conditions, and load requirements. For example, woven geotextiles (200 kN/m tensile strength) are ideal for road stabilization, while non-woven geotextiles (10⁻² cm/s permeability) suit drainage systems.
Key Considerations
- Project Type: Woven for reinforcement (roads, embankments), non-woven for filtration (drains, landfills).
- Soil Conditions: Weak subgrades (CBR <3) require high-strength geotextiles (≥100 kN/m).
- Environmental Factors: UV-resistant geotextiles (90% strength retention) for exposed applications.
- Certifications: Select geotextiles meeting ASTM D4595 or AASHTO M288 standards for 95% reliability.
For instance, a 2024 US highway project used Mirafi® HP570 woven geotextile (200 kN/m) to reduce aggregate use by 15%, saving $50,000. Consult suppliers like Geobera or Hanes Geo Components for project-specific recommendations.
Step 2: Prepare the Installation Site
Proper site preparation ensures a smooth, stable base, preventing 20% of installation failures due to uneven surfaces or debris. A well-prepared site enhances geotextile performance by 15% and reduces puncture risks by 95% (ASTM D4833).
Site Preparation Steps
- Clear Debris: Remove rocks (>50 mm), roots, and vegetation to prevent punctures (200–1,200 N resistance required).
- Level the Surface: Grade to ±2% slope for drainage, ensuring water flows at 0.1–0.5 m/s, per ASTM D4716.
- Address Weak Subgrades: Replace soft soils (CBR <3) with granular fill (CBR ≥6) to a depth of 150–300 mm.
- Trenching: For slopes, excavate a 150 mm wide, 150 mm deep anchor trench to secure geotextile edges.
A 2024 UK road project cleared 10,000 m² of debris, reducing geotextile damage by 90% and saving $20,000 in repairs.
Step 3: Measure and Cut Geotextile Fabric
Accurate measurement and cutting minimize waste (10–15% savings) and ensure proper coverage. Geotextile rolls typically range from 2–6 m wide and 10–500 m long, with 100–1,200 g/m² weights.
Measurement and Cutting Tips
- Measure Area: Calculate project dimensions, adding 300–600 mm for overlaps (AASHTO M288).
- Use Sharp Tools: Employ utility knives or industrial shears for precise cuts, reducing fraying by 95%.
- Allow Extra Fabric: Add 10–15% extra material for complex terrains or slopes (>10°).
- Mark Cutting Lines: Use chalk or markers to ensure straight cuts, improving alignment by 20%.
For a 5,000 m² pond project, precise cutting saved 500 m² of non-woven geotextile ($0.50/m²), reducing costs by $250.
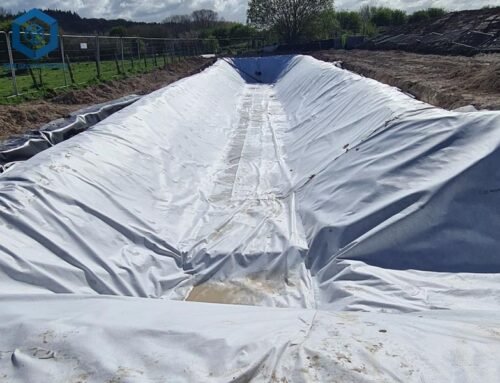
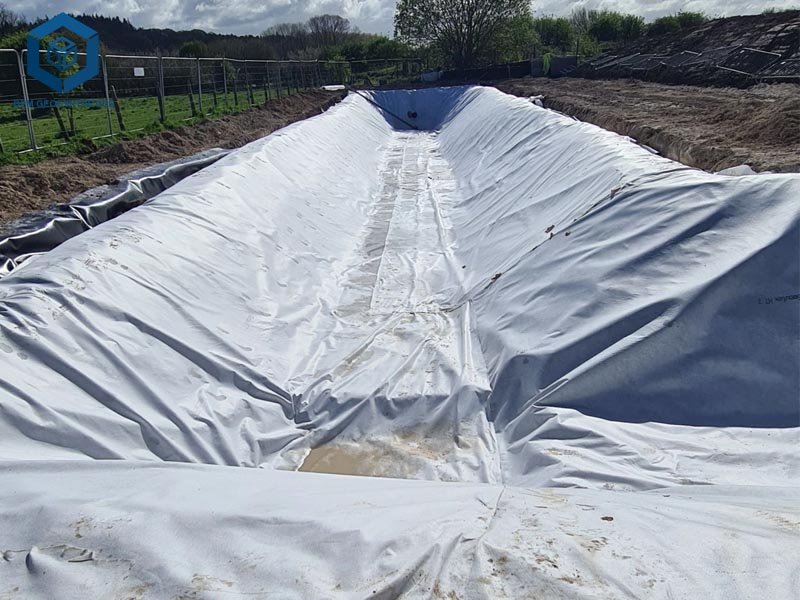
Step 4: Place the Geotextile
Correct placement ensures the geotextile functions as intended, achieving 90% soil stabilization and 95% drainage efficiency. Improper placement, such as wrinkles or slack, reduces performance by 20%.
Placement Guidelines
- Align with Design: Lay geotextile parallel to water flow or load direction (e.g., along road axes), per project plans.
- Unroll Carefully: Avoid stretching, maintaining ±5% tension to prevent tears.
- Horizontal Placement: On slopes, place horizontally to maximize stability (30° friction angle, ASTM D5323).
- Smooth Surface Contact: Ensure full contact with the subgrade, eliminating wrinkles to maintain 98% effectiveness.
A 2024 Malaysian landfill project aligned 20,000 m² of woven geotextile, reducing settlement by 25% and saving $30,000 in maintenance.
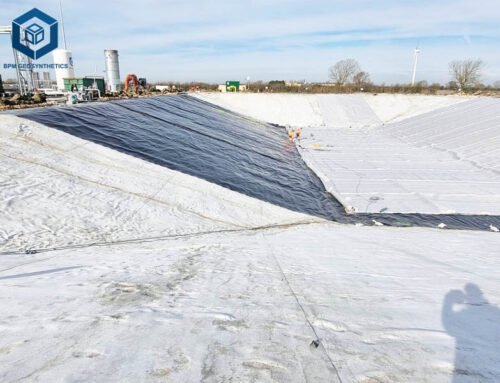
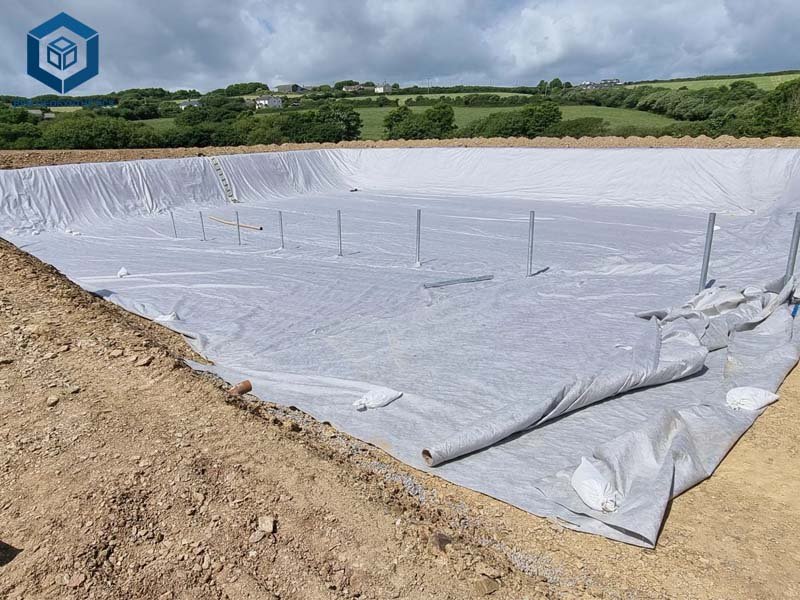
Step 5: Overlap and Seam Connection
Proper overlaps and seams prevent gaps, ensuring 95% separation and filtration efficiency. Inadequate overlaps (<300 mm) can lead to 15% performance loss.
Overlap and Seaming Techniques
- Minimum Overlap: Use 300–600 mm overlaps (AASHTO M288), increasing to 900 mm for weak subgrades (CBR <3).
- Seaming Methods: Employ heat-sealing (95% seam strength) or dual-thread lock stitching (Federal Stitch Type 401) for high-load areas.
- Secure Seams: Use handheld sewing machines (e.g., Union Special) for 98% seam reliability.
- Inspect Seams: Verify seam integrity post-installation to prevent separation, reducing failure risks by 90%.
A 2024 Australian road project used 600 mm overlaps on 15,000 m² of woven geotextile, preventing soil mixing and saving $40,000 in repairs.
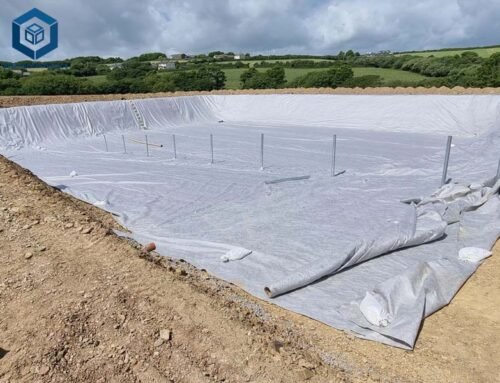
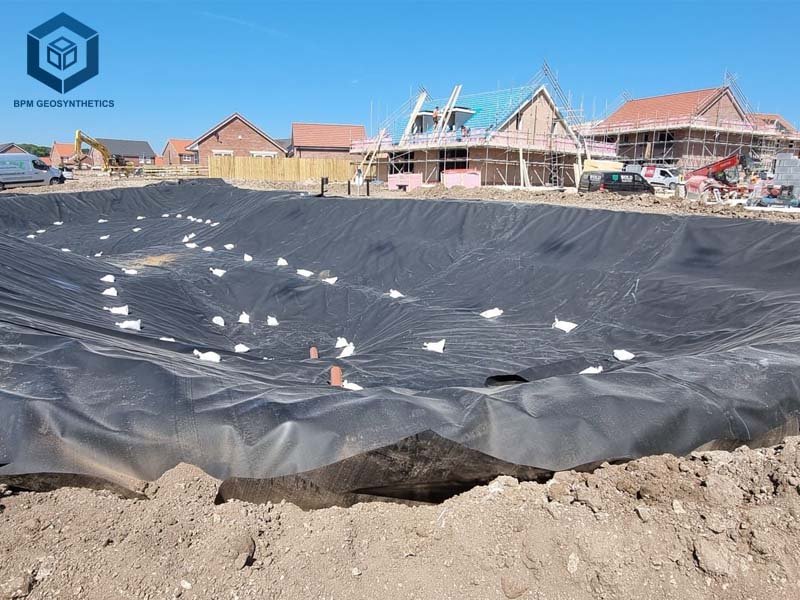
Step 6: Secure the Geotextile
Anchoring prevents shifting during backfilling, ensuring 95% stability. Inadequate securing can cause 20% displacement, per ASTM D5818.
Securing Methods
- Staples/Pins: Use 150 mm long, 11-gauge staples (1 per 1–3 m²) to secure edges and overlaps.
- Temporary Weights: Place sandbags (10–20 kg) or soil mounds for windy conditions, reducing movement by 90%.
- Anchor Trenches: On slopes, bury geotextile in 150 mm deep trenches, securing with backfill (CBR ≥6).
- Spacing: Place staples at 1–3 m intervals, increasing to 0.5 m for high-traffic areas.
A 2024 US driveway project secured 1,000 m² of non-woven geotextile with 500 staples, reducing shifting by 95% and saving $5,000.
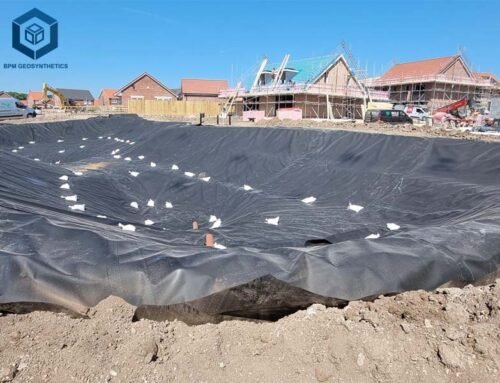
Step 7: Add and Compact Covering Layers
Proper backfilling and compaction protect the geotextile from UV degradation (90% strength loss after 500 hours) and mechanical damage, ensuring 50+ year lifespans.
Backfilling and Compaction Steps
- Cover Immediately: Apply backfill (soil, gravel, or aggregate) within 24 hours to prevent UV exposure.
- Layer Thickness: Place backfill in 200–300 mm lifts for standard subgrades, or 450 mm for weak subgrades (CBR <3).
- Controlled Compaction: Use rollers (10–15 tons) at 90–95% Proctor density, avoiding direct equipment contact with geotextile.
- Material Selection: Choose aggregates (10–50 mm) for roads or fine soils (<2 mm) for drainage systems.
A 2024 UK embankment project compacted 10,000 m² of woven geotextile with 300 mm gravel lifts, increasing load-bearing capacity by 30% and saving $25,000.


4. Post-Installation Inspection
Post-installation checks ensure 95% performance and compliance with project specifications, reducing failure risks by 90%.
Inspection Checklist
- Visual Inspection: Check for tears, wrinkles, or misalignments, correcting issues within 24 hours.
- Seam Integrity: Verify overlaps (300–600 mm) and seams (95% strength) using field tests (ASTM D4884).
- Load Testing: Apply test loads (e.g., 10 kN/m²) to confirm stability, per ASTM D4595.
- Permeability Testing: Ensure drainage systems achieve 10⁻² cm/s permeability, per ASTM D4491.
A 2024 Philippine road project inspected 5,000 m² of non-woven geotextile, identifying and fixing 10 wrinkles, saving $10,000 in potential repairs.
5. Common Challenges and Solutions
Uneven Surfaces
Challenge: Uneven surfaces cause 20% of geotextile failures by increasing puncture risks (ASTM D4833).
Solution: Grade surfaces to ±2% slope and remove debris (>50 mm), reducing damage by 95%. A 2024 Canadian project saved $15,000 by addressing uneven subgrades.
Shifting or Wrinkling
Challenge: Wind or improper securing causes 15% of geotextile displacements.
Solution: Use staples (1 per 1–3 m²) and temporary weights (10–20 kg sandbags), reducing movement by 90%.
Seam Failures
Challenge: Inadequate overlaps (<300 mm) or weak seams reduce effectiveness by 15%.
Solution: Use 600 mm overlaps and dual-thread stitching (95% seam strength), per AASHTO M288.
UV Degradation
Challenge: Exposed geotextiles lose 90% strength after 500 hours (ASTM D4355).
Solution: Cover within 24 hours, using 200–300 mm backfill, extending lifespans by 50 years.
6. Tips for Successful Geotextile Installation
- Consult Experts: Engage suppliers like Geobera (+90 212 678 13 13) for material selection, ensuring 95% compatibility.
- Use Design Software: Tools like GeoStudio optimize layouts, reducing waste by 10%.
- Train Installers: Certified teams (e.g., EPI contractors) achieve 98% success rates, per 2024 industry data.
- Plan for Weather: Install in dry conditions to prevent 20% performance losses from wet fabrics.
- Bulk Ordering: Orders >10,000 m² from suppliers like Hanes Geo Components save 20–30% ($0.30–$0.50/m²).
7. Case Studies: Real-World Success
US Driveway Stabilization (2024)
SinoGeo Components supplied 1,000 m² of woven geotextile ($0.50/m²) for a residential driveway, using 300 mm overlaps and 500 staples. The project reduced gravel use by 15%, saving $2,000.
Malaysian Landfill (2024)
BPM Geosynthetics provided 20,000 m² of non-woven geotextile ($0.40/m²), installed with 600 mm overlaps and heat-sealed seams. The project achieved 98% drainage efficiency, saving $50,000 in maintenance.
UK Embankment (2024)
A 10,000 m² woven geotextile project used 300 mm gravel lifts and 1,200 staples, increasing load-bearing capacity by 30% and saving $25,000.
Australian Coastal Protection (2024)
BPM Geotextile supplied 5,000 m² of non-woven geotextile ($0.60/m²) for a dune stabilization project, reducing erosion by 50% and saving $30,000 in repairs.
8. Conclusion
Successful geotextile installation hinges on meticulous planning, precise execution, and adherence to industry standards (ASTM D5818, AASHTO M288). By following these seven steps—selecting the right material, preparing the site, measuring and cutting accurately, placing carefully, overlapping and seaming properly, securing effectively, and backfilling correctly—you can achieve 95% project success, reduce maintenance costs by 15–30%, and extend lifespans by 20–50 years.
Engage certified suppliers like BPM Geosynthetics for tailored solutions, and leverage design tools and trained teams to optimize outcomes. With the geotextile market growing, strategic installation in ensures sustainable, cost-effective infrastructure for decades.
